网站模板编辑工具厦门网站外包
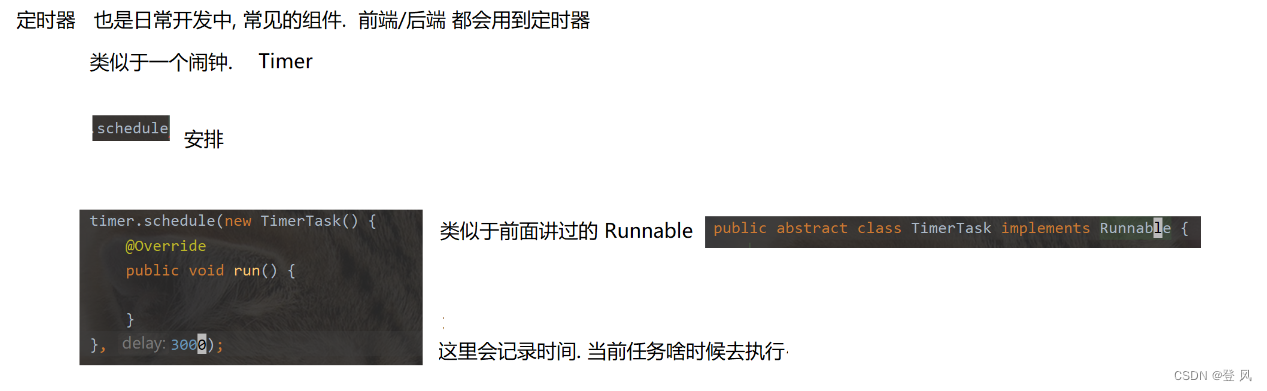
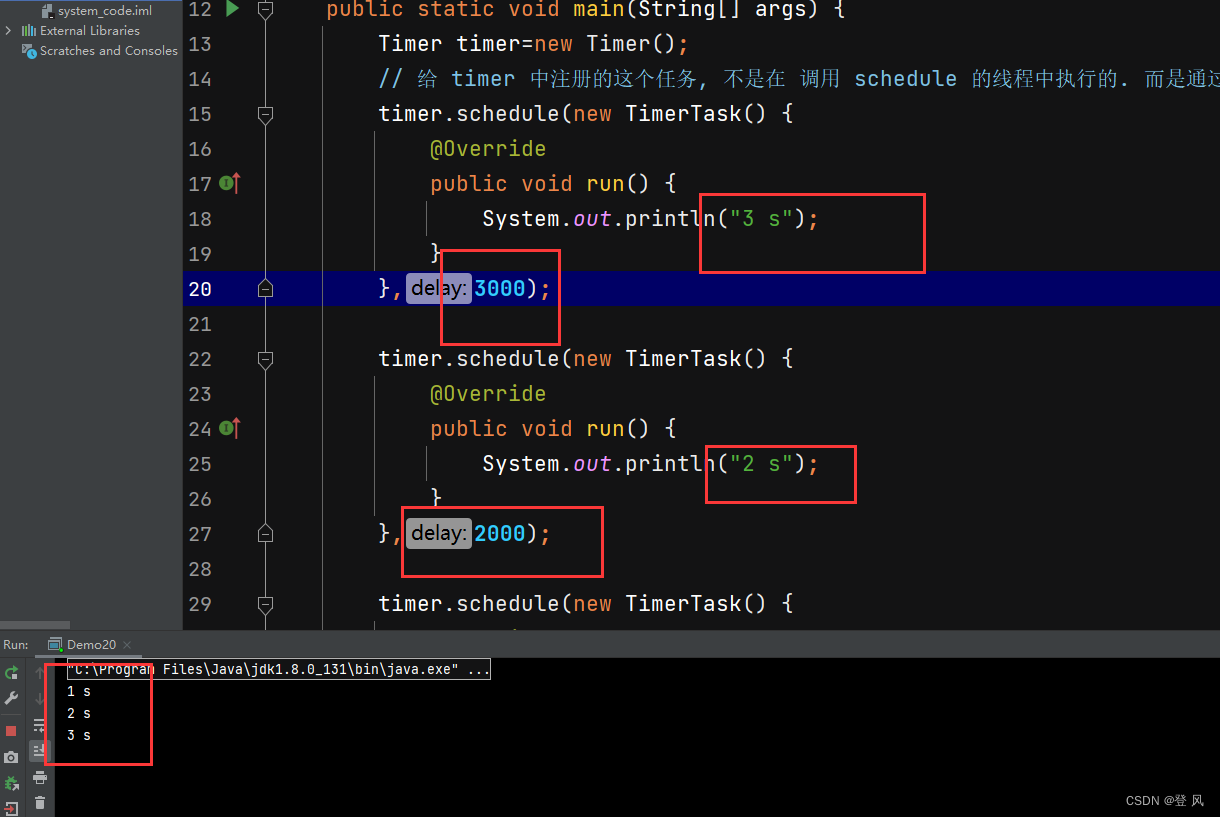
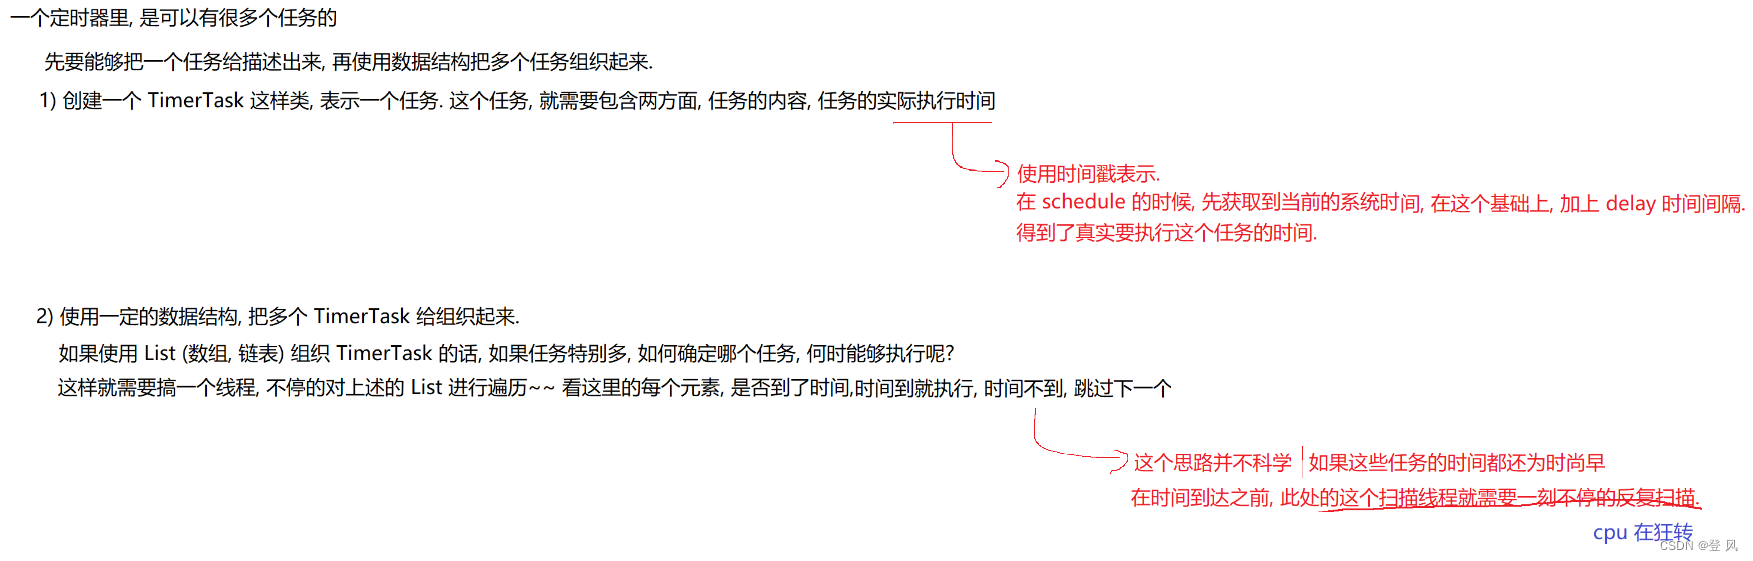
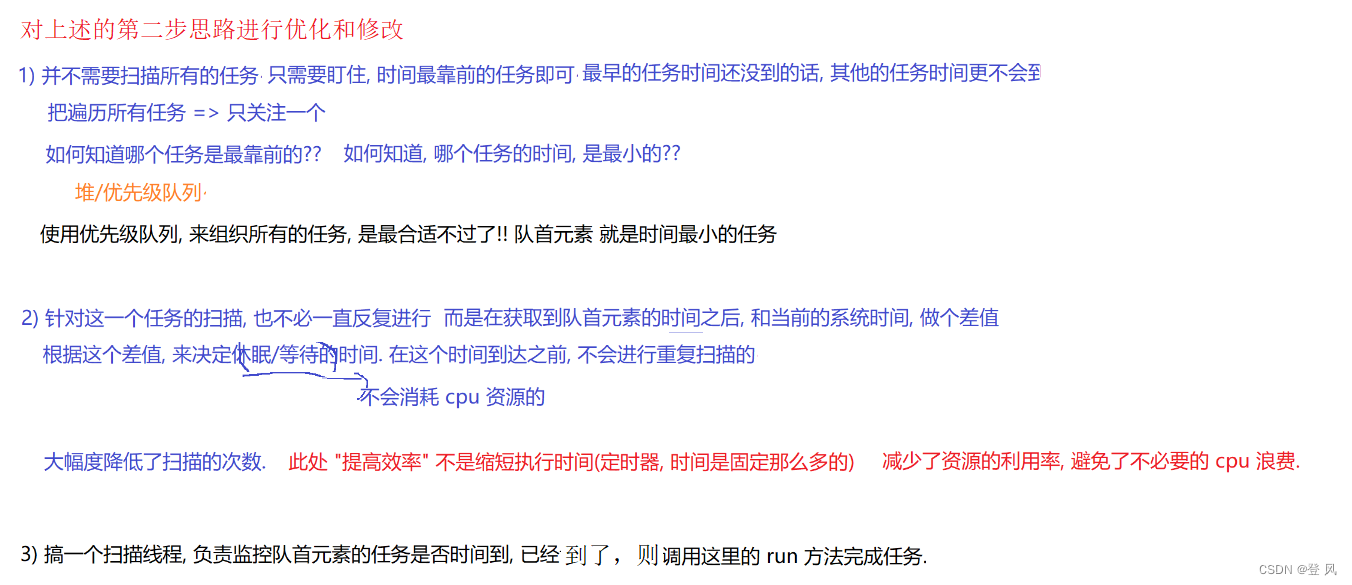
模拟实现一个定时器

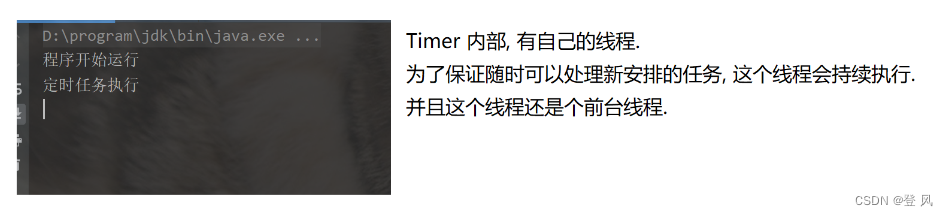
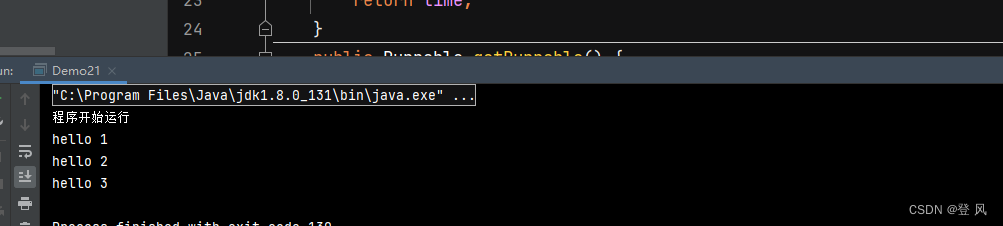
运行结果如下:
上述模拟定时器的全部代码:
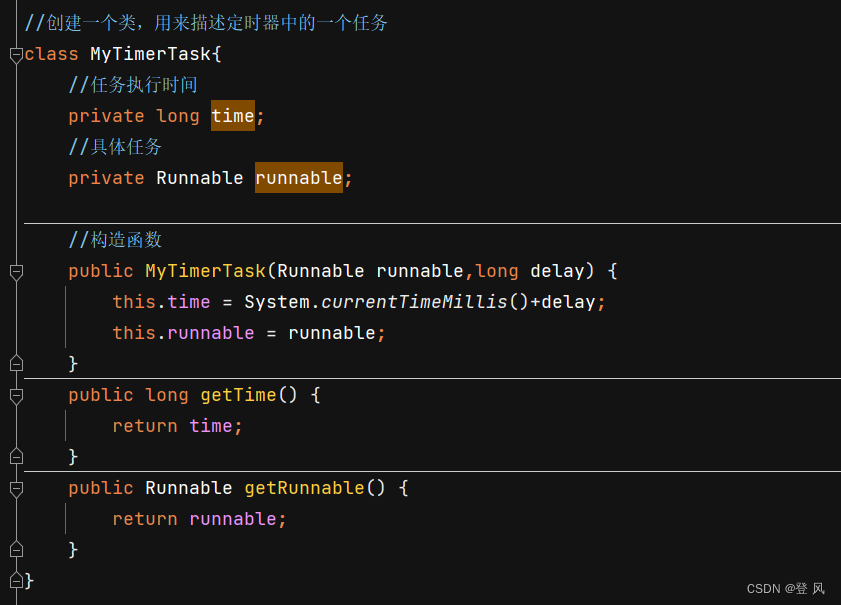
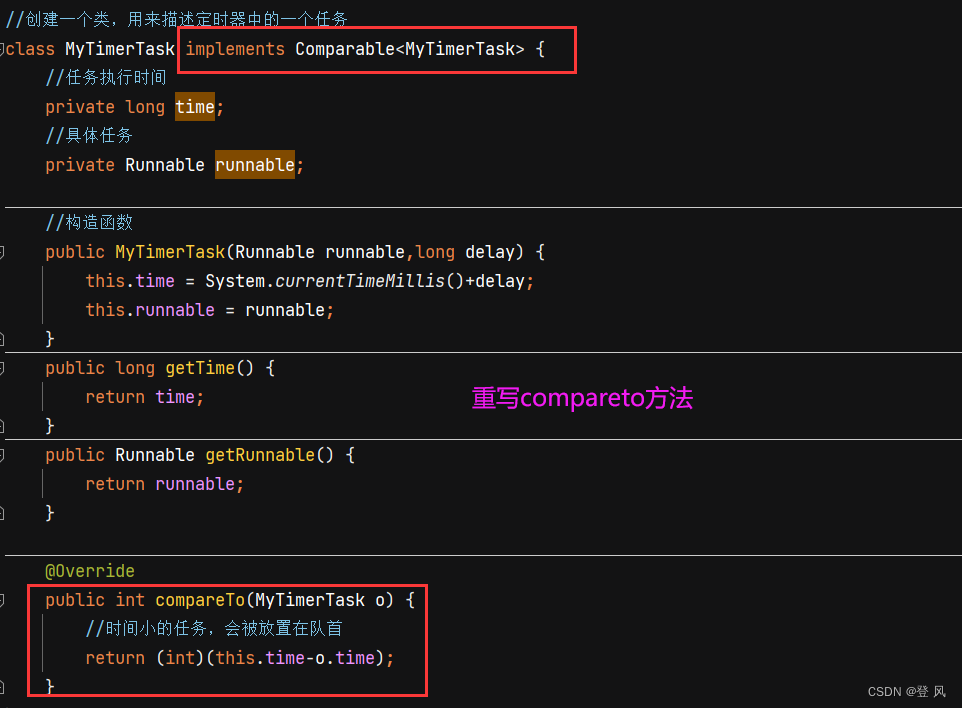
import java.util.PriorityQueue;//创建一个类,用来描述定时器中的一个任务
class MyTimerTask implements Comparable<MyTimerTask> {//任务执行时间private long time;//具体任务private Runnable runnable;//构造函数public MyTimerTask(Runnable runnable,long delay) {this.time = System.currentTimeMillis()+delay;this.runnable = runnable;}public long getTime() {return time;}public Runnable getRunnable() {return runnable;}@Overridepublic int compareTo(MyTimerTask o) {//时间小的任务,会被放置在队首return (int)(this.time-o.time);}
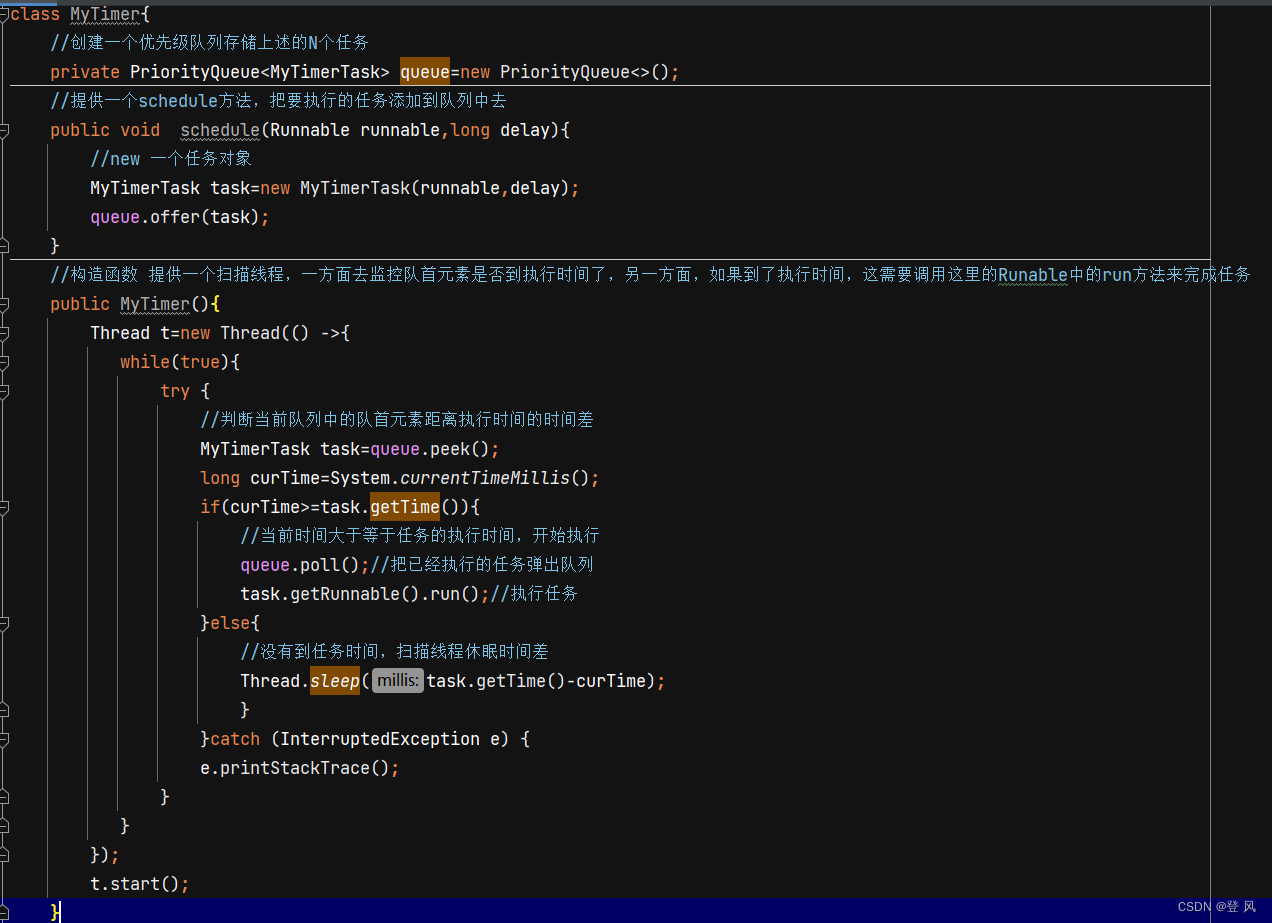
}//定时器类的本体
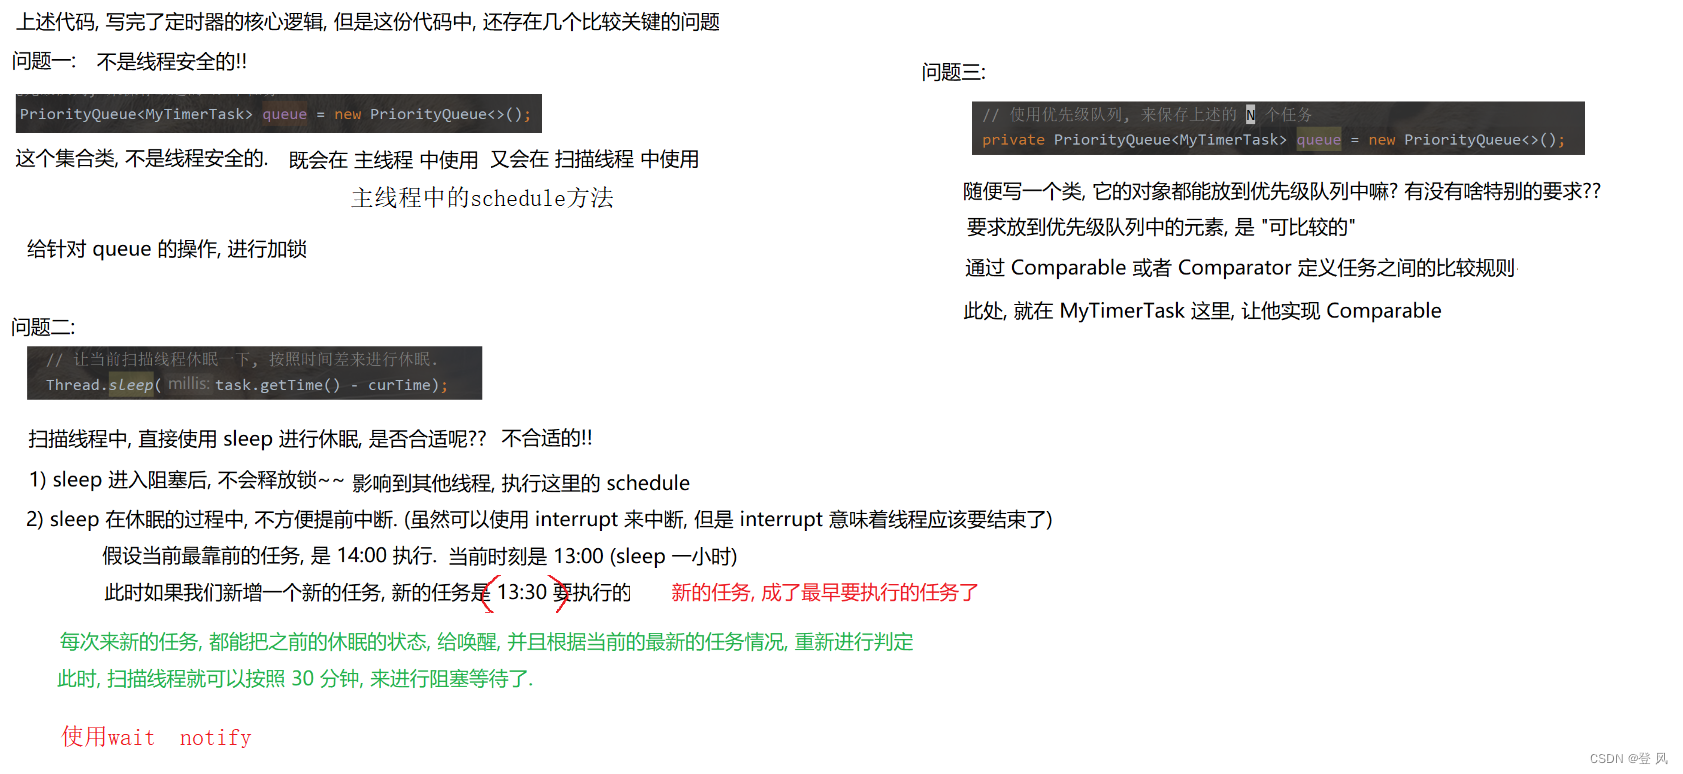
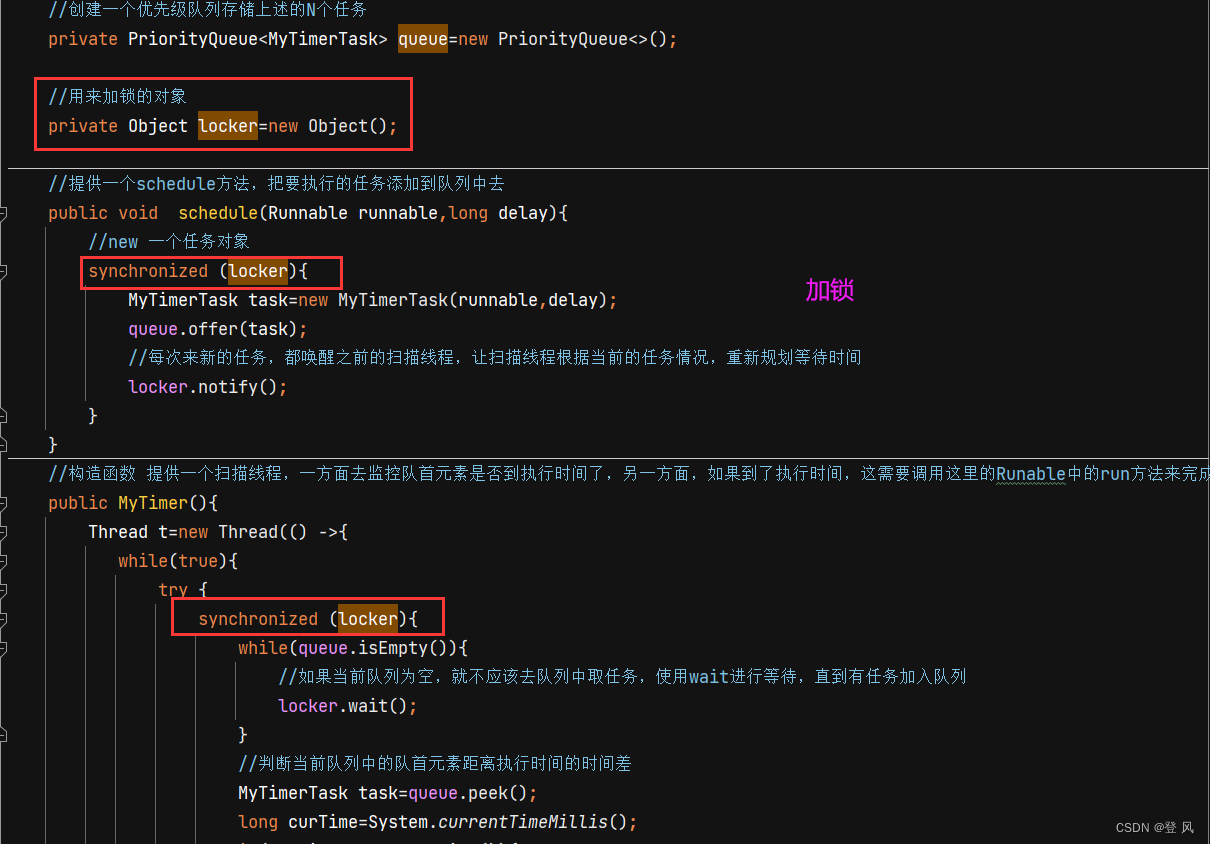
class MyTimer{//创建一个优先级队列存储上述的N个任务private PriorityQueue<MyTimerTask> queue=new PriorityQueue<>();//用来加锁的对象private Object locker=new Object();//提供一个schedule方法,把要执行的任务添加到队列中去public void schedule(Runnable runnable,long delay){//new 一个任务对象synchronized (locker){MyTimerTask task=new MyTimerTask(runnable,delay);queue.offer(task);//每次来新的任务,都唤醒之前的扫描线程,让扫描线程根据当前的任务情况,重新规划等待时间locker.notify();}}//构造函数 提供一个扫描线程,一方面去监控队首元素是否到执行时间了,另一方面,如果到了执行时间,这需要调用这里的Runable中的run方法来完成任务public MyTimer(){Thread t=new Thread(() ->{while(true){try {synchronized (locker){while(queue.isEmpty()){//如果当前队列为空,就不应该去队列中取任务,使用wait进行等待,直到有任务加入队列locker.wait();}//判断当前队列中的队首元素距离执行时间的时间差MyTimerTask task=queue.peek();long curTime=System.currentTimeMillis();if(curTime>=task.getTime()){//当前时间大于等于任务的执行时间,开始执行queue.poll();//把已经执行的任务弹出队列task.getRunnable().run();//执行任务}else{//没有到任务时间,扫描线程休眠时间差//Thread.sleep(task.getTime()-curTime);locker.wait(task.getTime()-curTime);}}}catch (InterruptedException e) {e.printStackTrace();}}});t.start();}}public class Demo21 {public static void main(String[] args) {MyTimer timer=new MyTimer();timer.schedule(new Runnable() {@Overridepublic void run() {System.out.println("hello 3");}},3000);timer.schedule(new Runnable() {@Overridepublic void run() {System.out.println("hello 2");}},2000);timer.schedule(new Runnable() {@Overridepublic void run() {System.out.println("hello 1");}},1000);System.out.println("程序开始运行");}
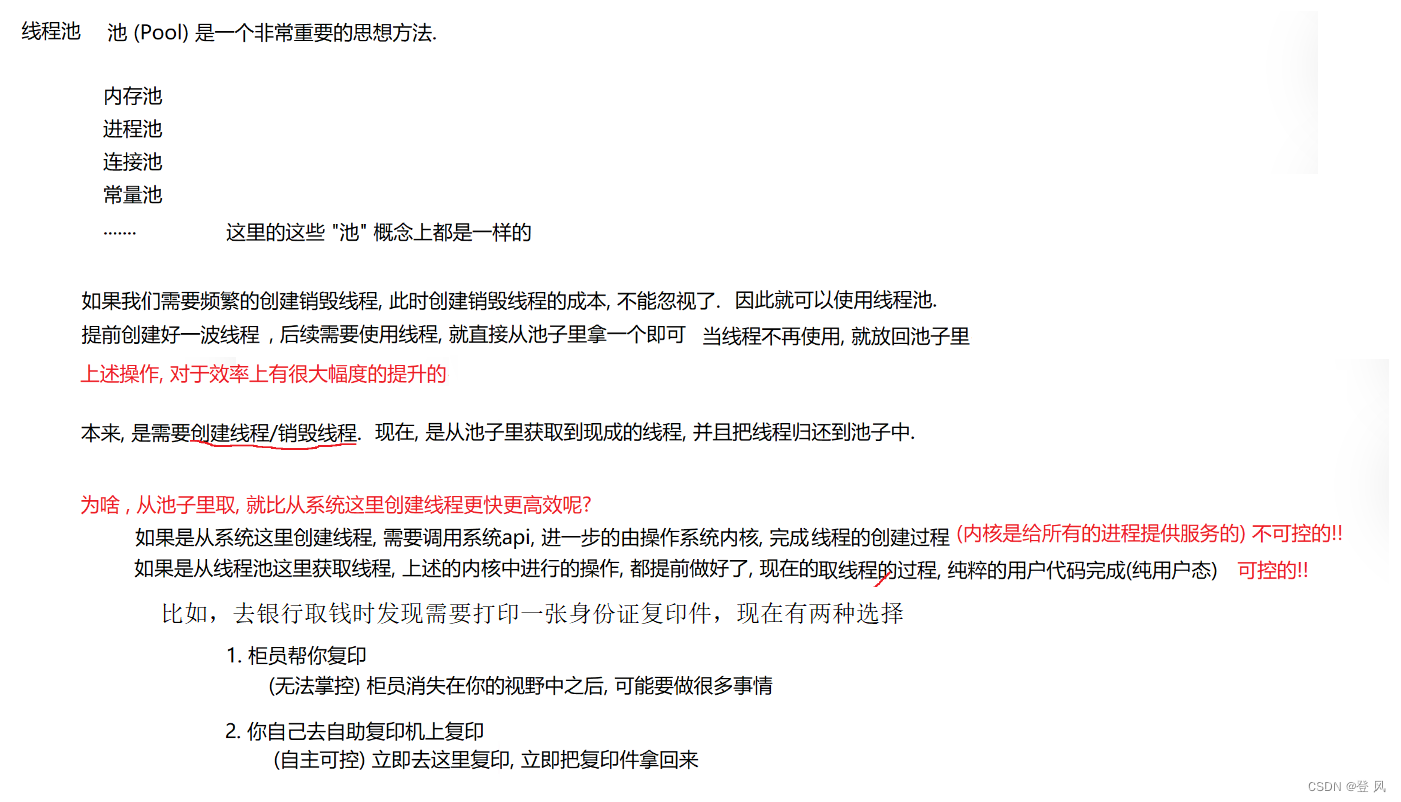
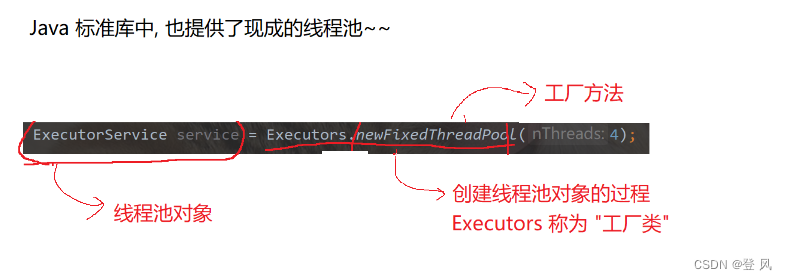
}线程池
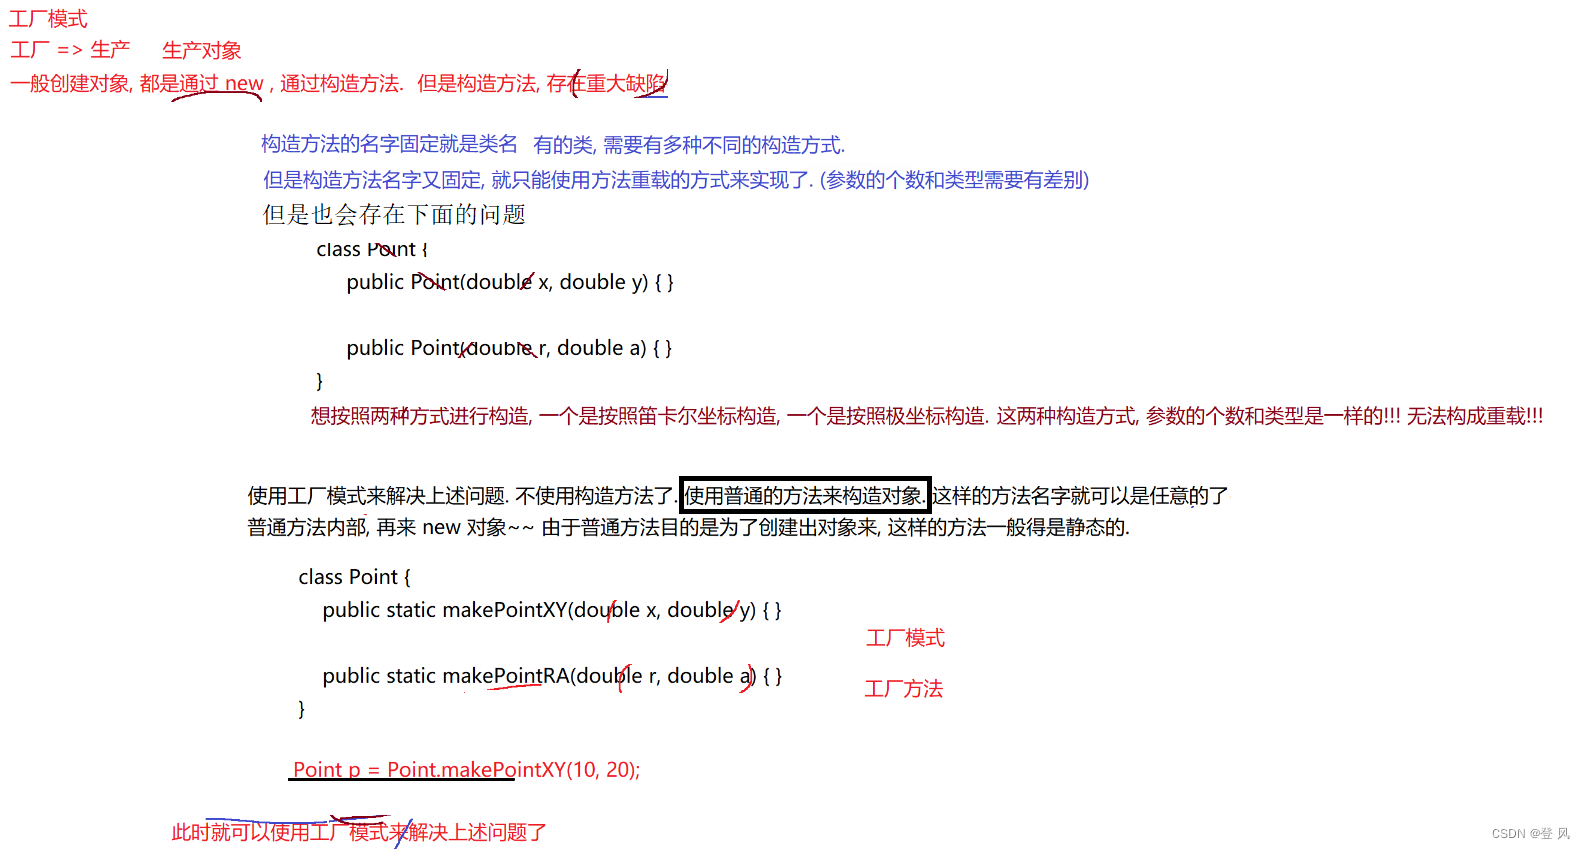
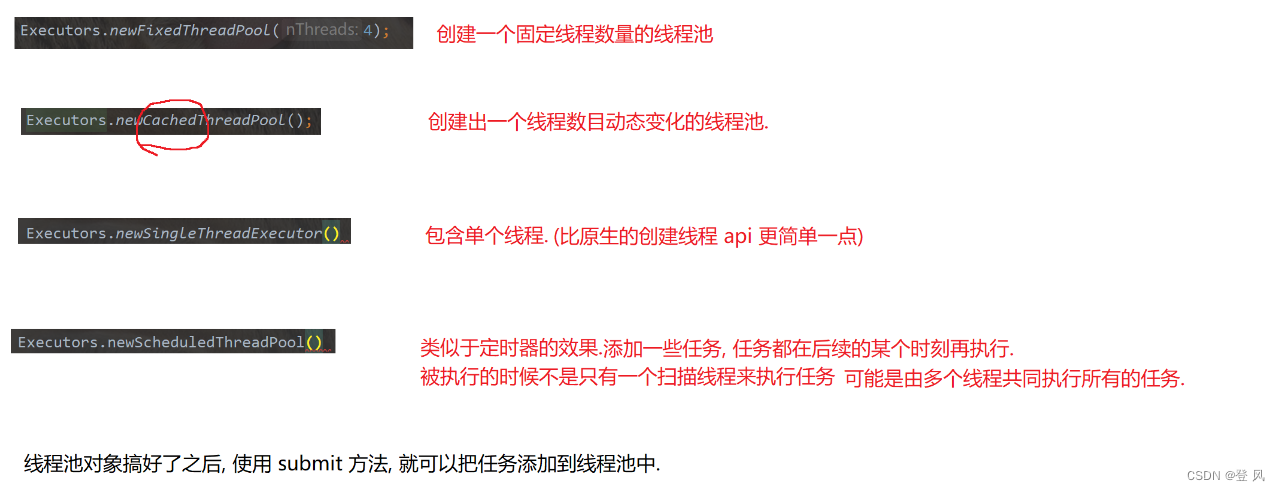
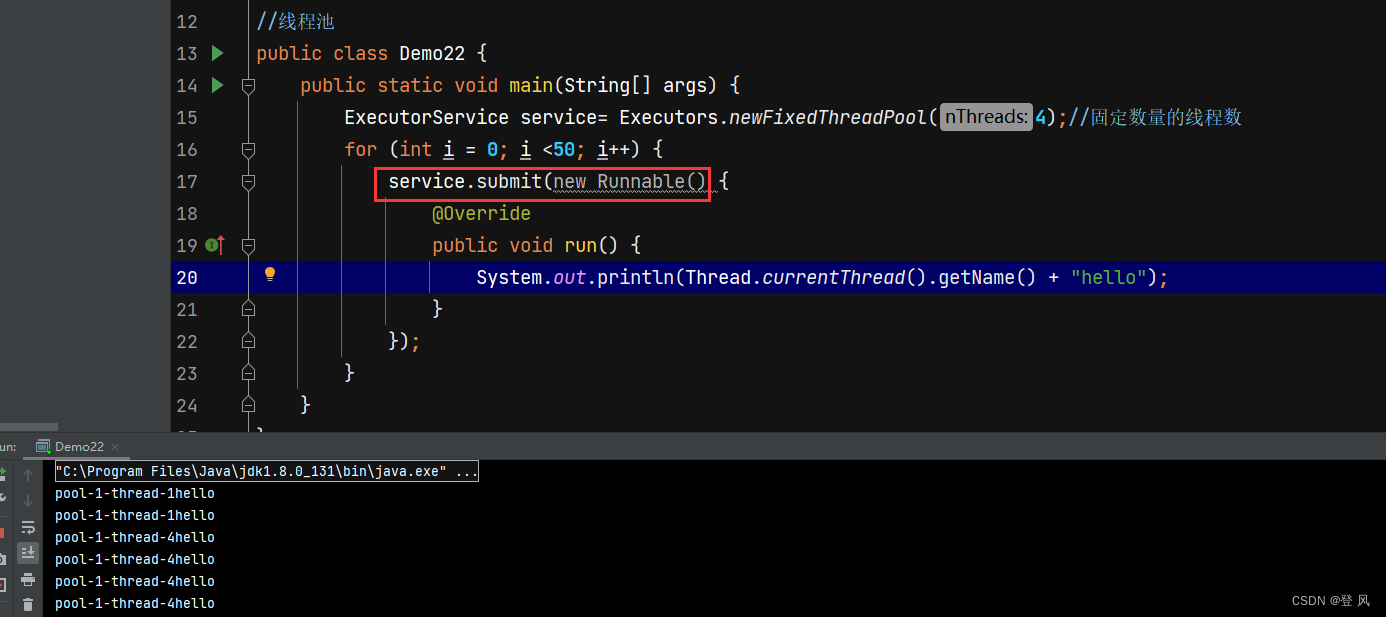
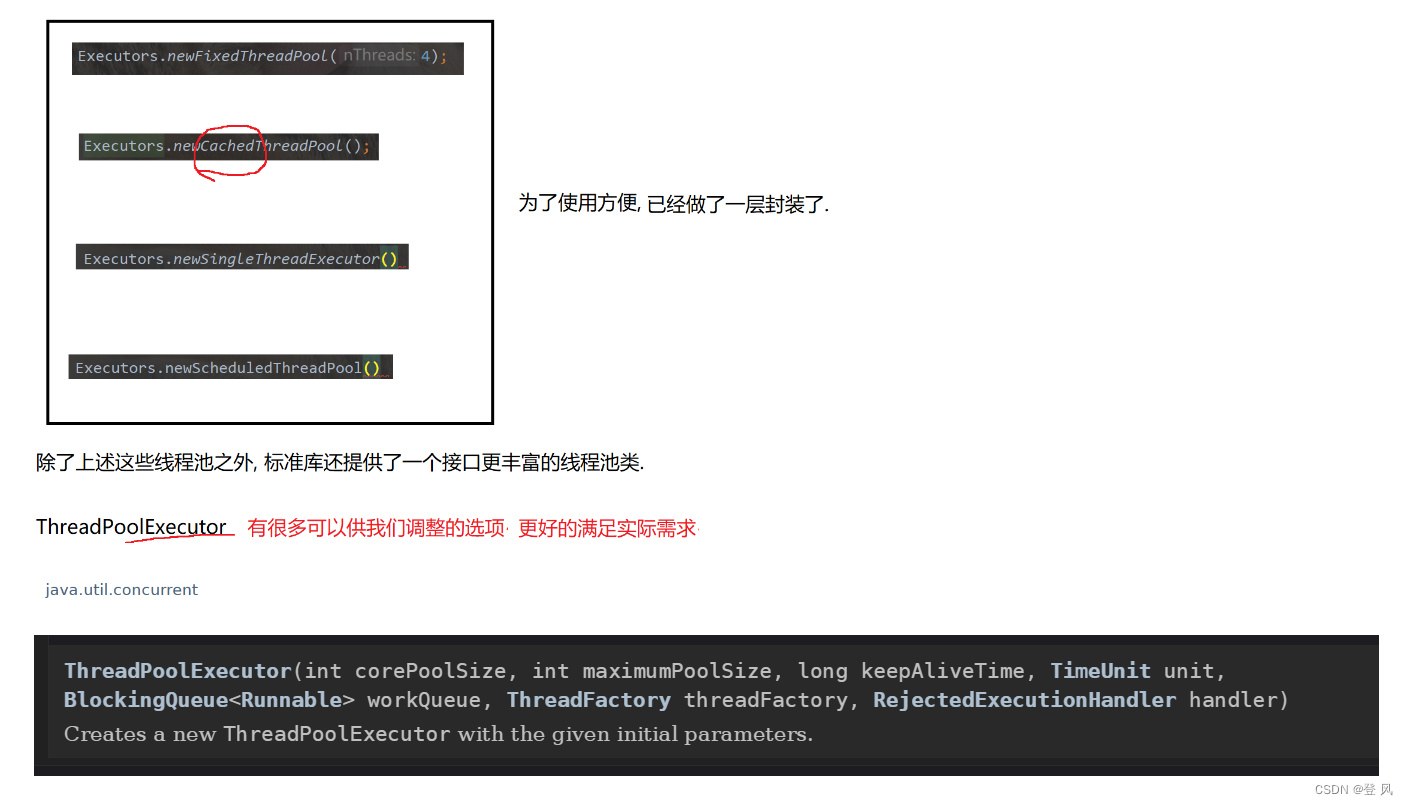
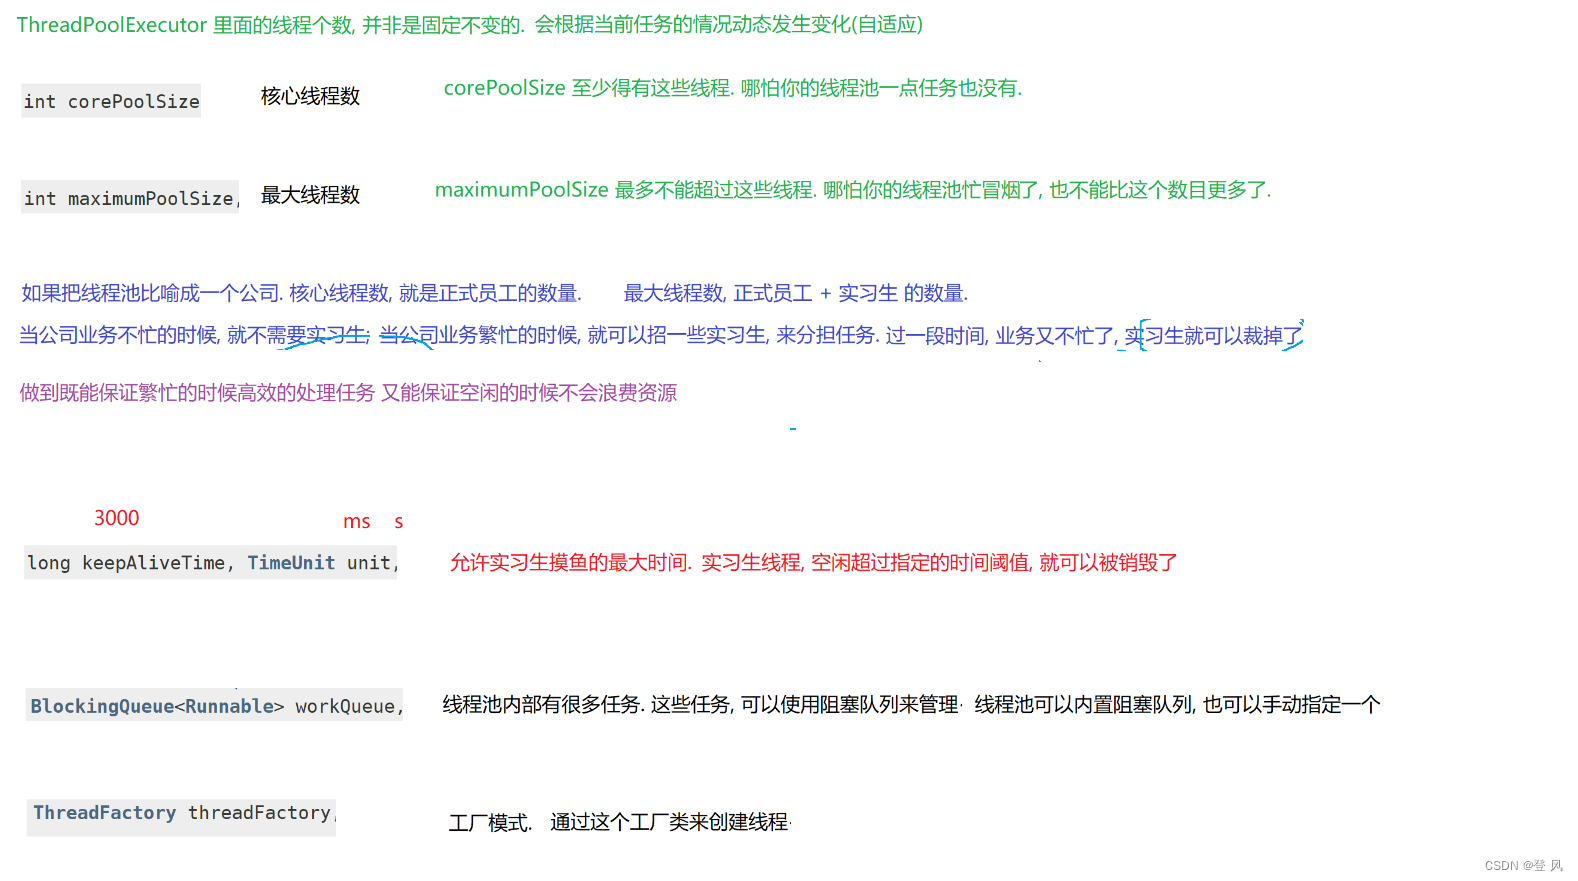
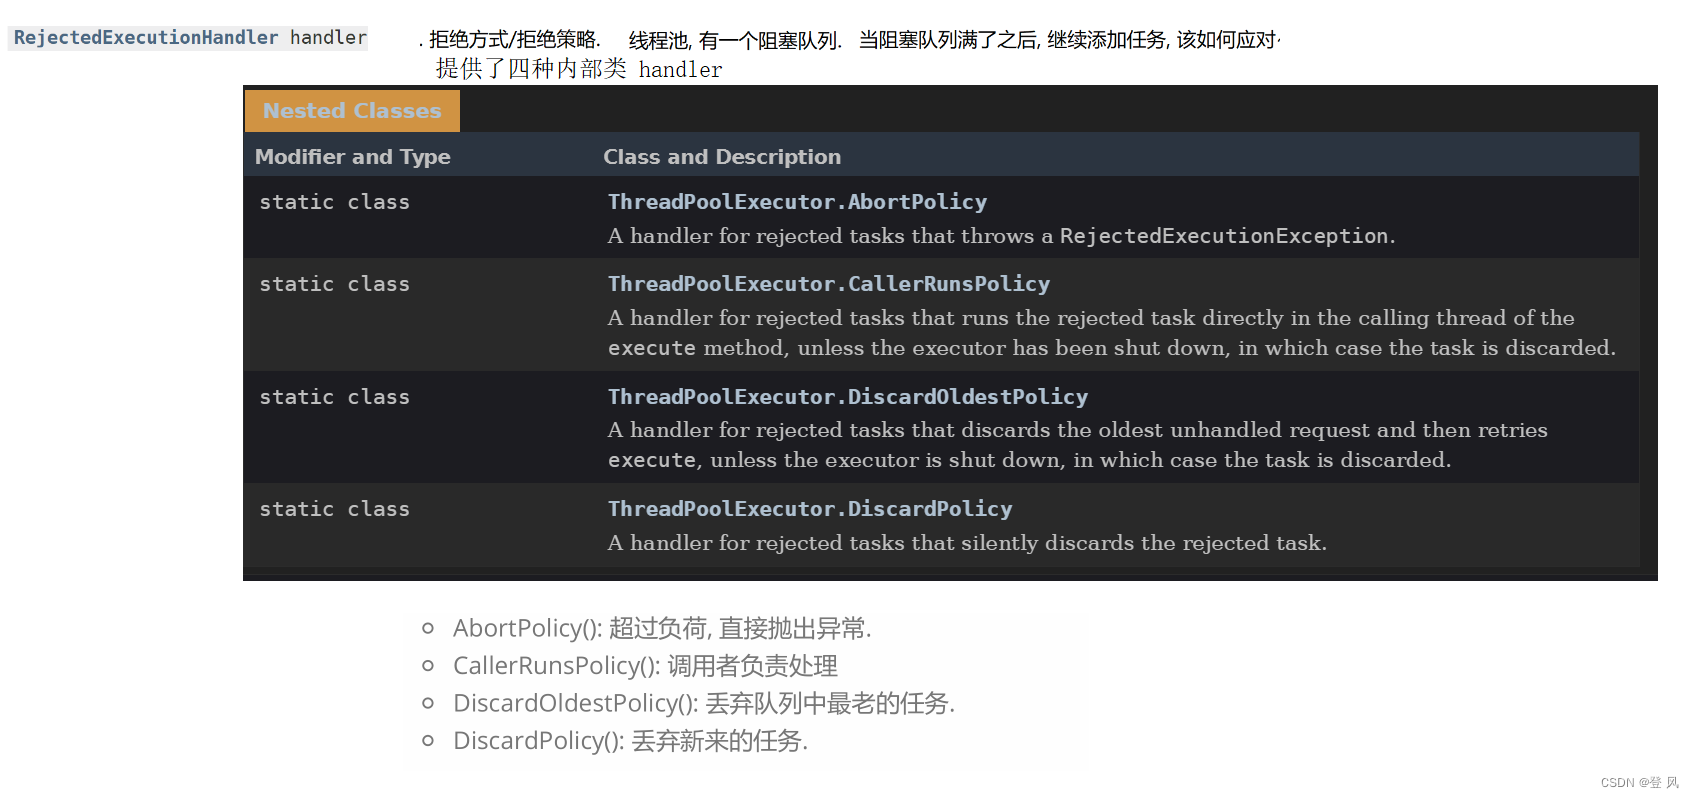
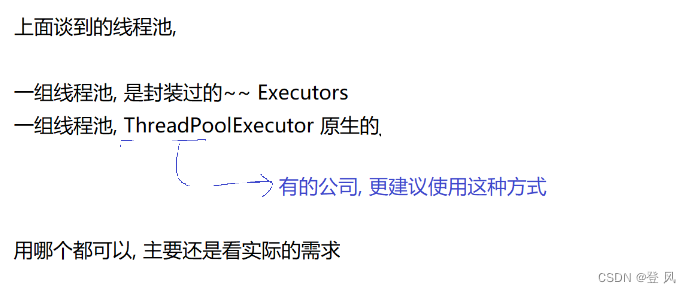
模拟实现一个线程池
只需要提交任务给线程池即可
核心操作为 submit, 将任务加入线程池中
使用一个 BlockingQueue 组织所有的任务
代码如下:
import java.util.concurrent.BlockingQueue;
import java.util.concurrent.LinkedBlockingQueue;//模拟实现一个线程池
class MyThreadPool{//将添加到线程池中的任务可以放置到这个队列中private BlockingQueue<Runnable> queue =new LinkedBlockingQueue<>();//通过这个方法可以将任务添加到线程池中public void submit(Runnable runnable) throws InterruptedException {queue.put(runnable);}//构造函数,创建一个线程池,数量为npublic MyThreadPool(int n){for (int i = 0; i <n; i++) {Thread t=new Thread(() ->{while(true){try {//取放入线程池队列中的任务进行执行Runnable runnable= queue.take();runnable.run();} catch (InterruptedException e) {e.printStackTrace();}}});t.start();}}}
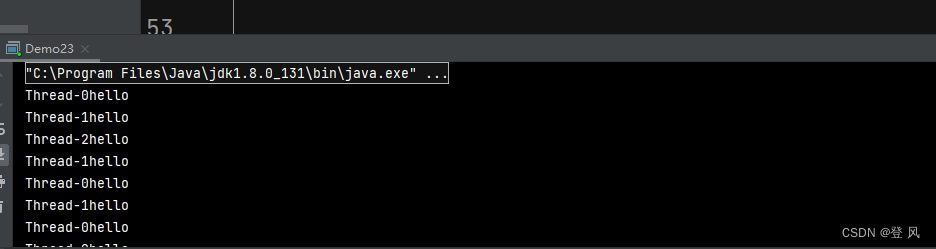
public class Demo23 {public static void main(String[] args) throws InterruptedException {MyThreadPool myThreadPool=new MyThreadPool(4);for (int i = 0; i <10; i++) {myThreadPool.submit(new Runnable() {@Overridepublic void run() {System.out.println(Thread.currentThread().getName()+"hello");}});}}
}执行结果如下:

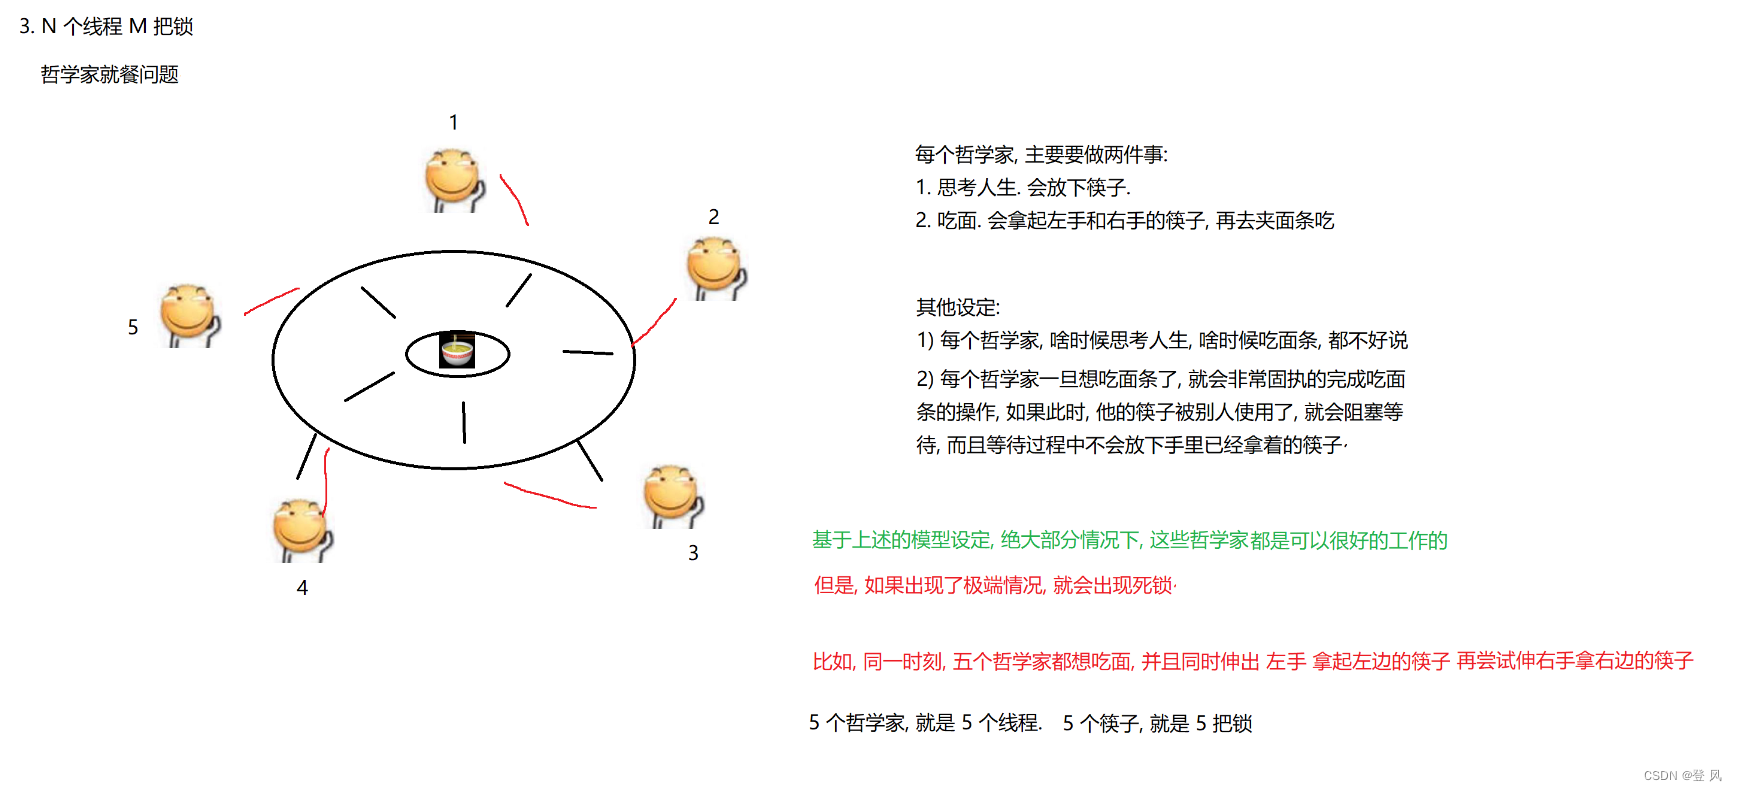
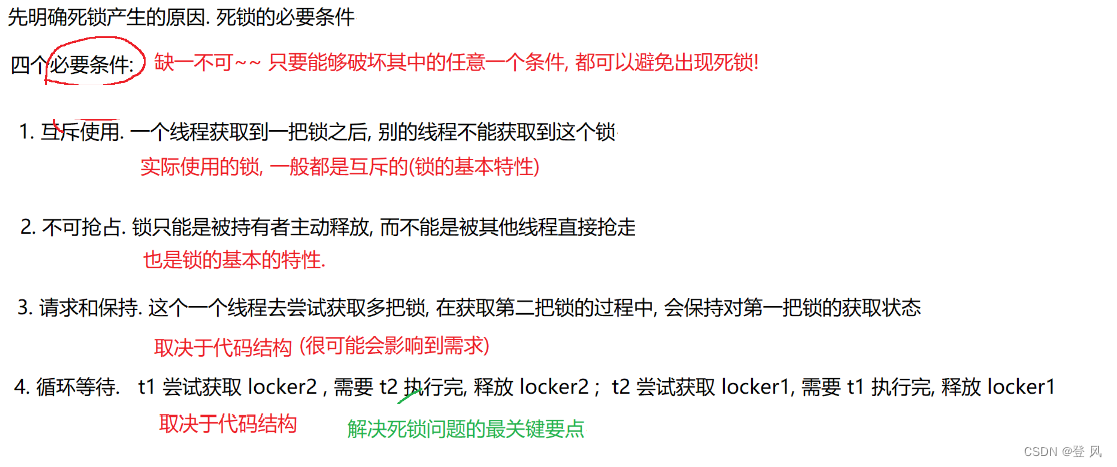
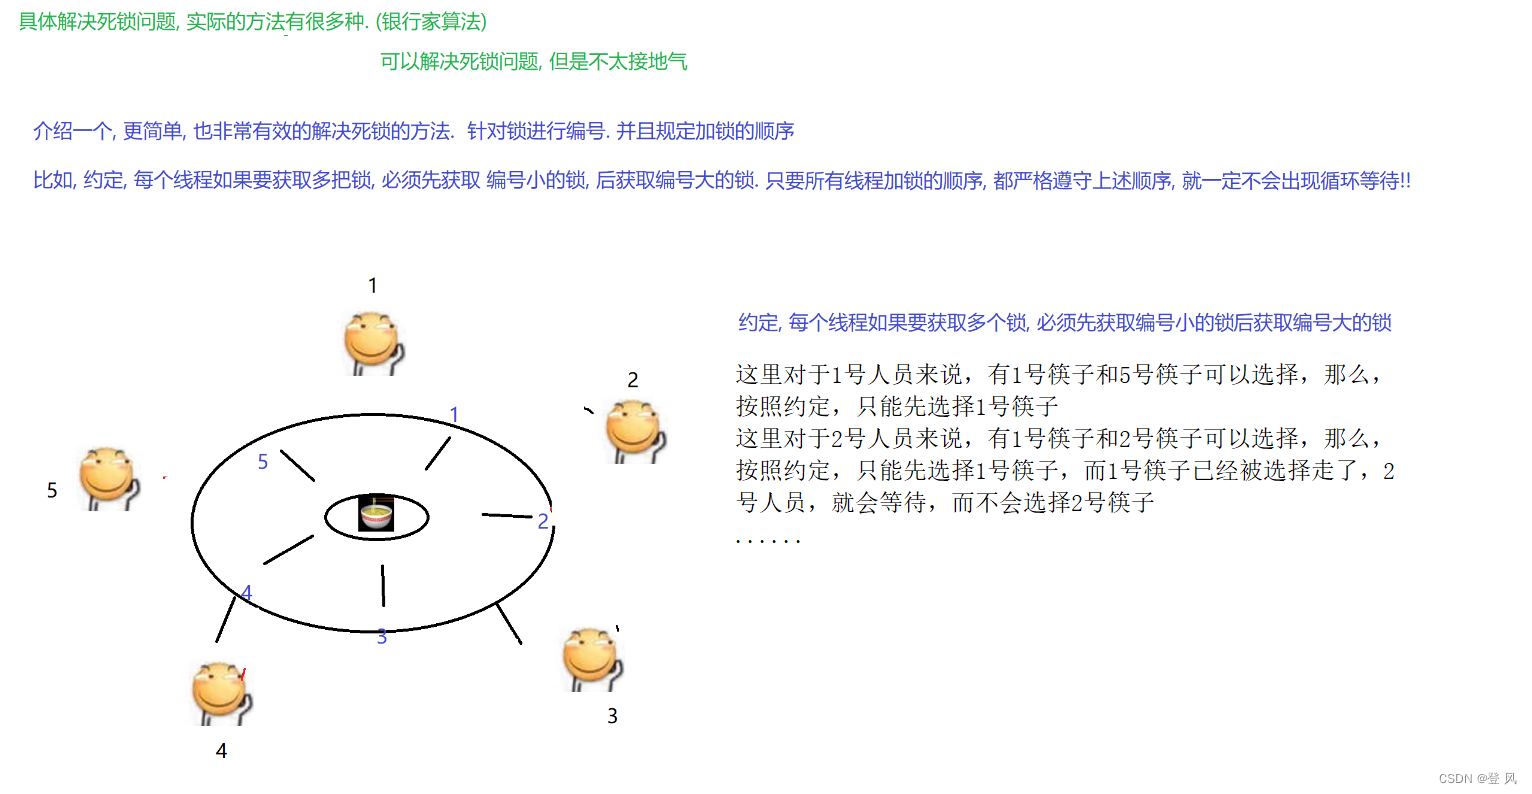
进阶内容


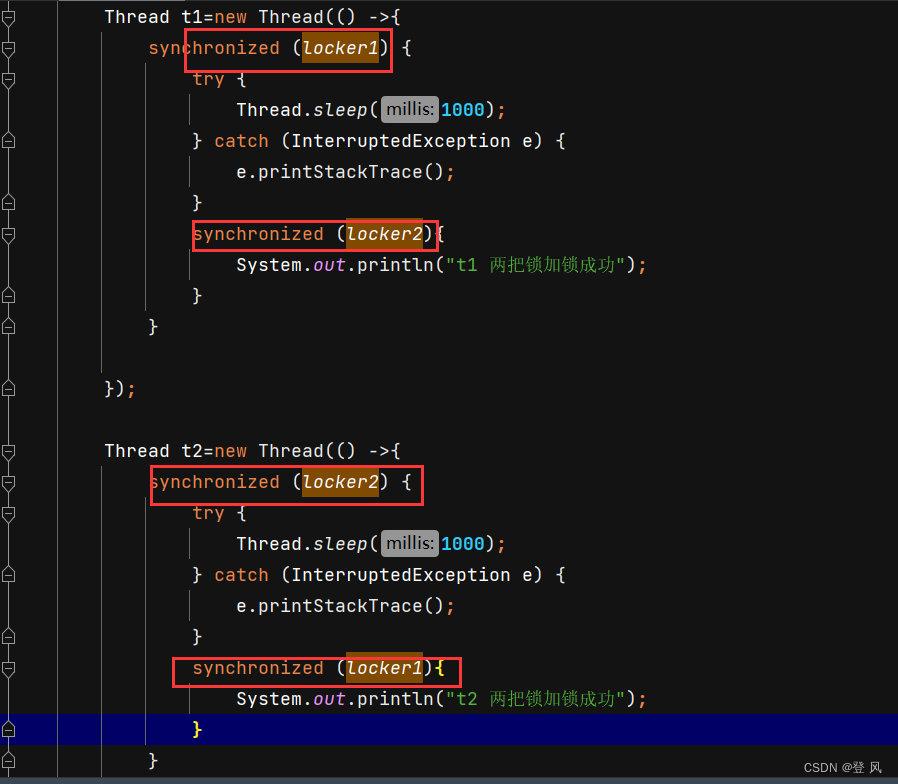
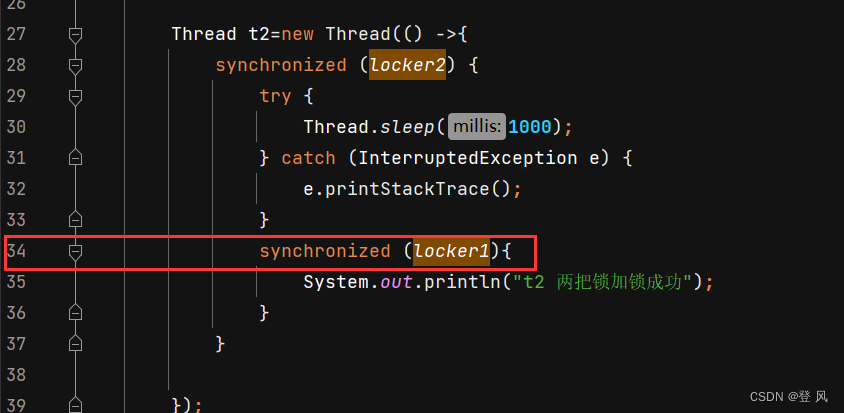
上述第二种情况的案例,如下
结果如下:
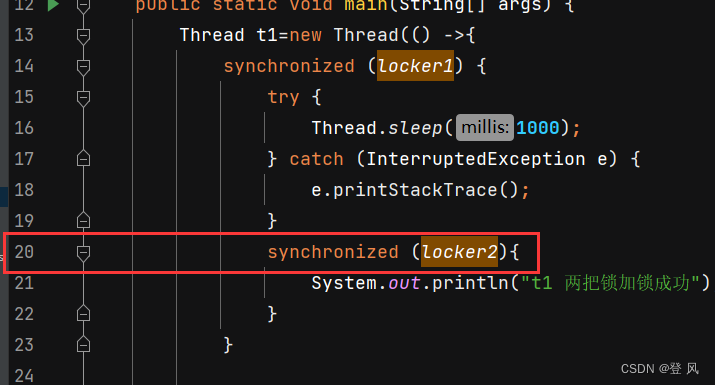
上述过程的所有代码:
//死锁
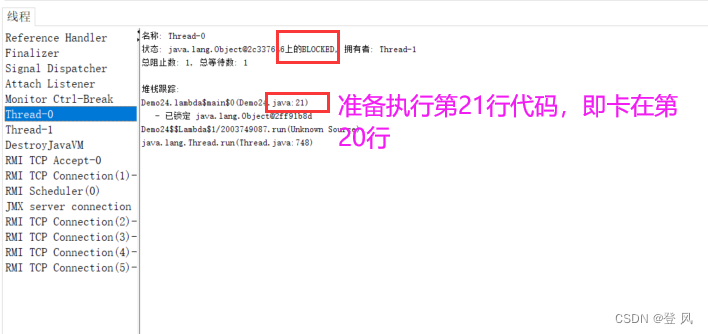
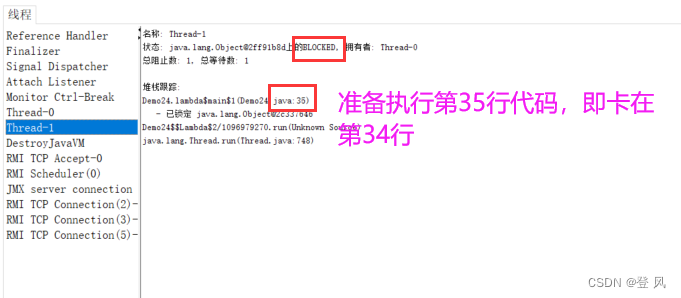
public class Demo24 {private static Object locker1=new Object();private static Object locker2=new Object();public static void main(String[] args) {Thread t1=new Thread(() ->{synchronized (locker1) {try {Thread.sleep(1000);} catch (InterruptedException e) {e.printStackTrace();}synchronized (locker2){System.out.println("t1 两把锁加锁成功");}}});Thread t2=new Thread(() ->{synchronized (locker2) {try {Thread.sleep(1000);} catch (InterruptedException e) {e.printStackTrace();}synchronized (locker1){System.out.println("t2 两把锁加锁成功");}}});t1.start();t2.start();}
}我们可以通过jconsole来观察线程的执行过程

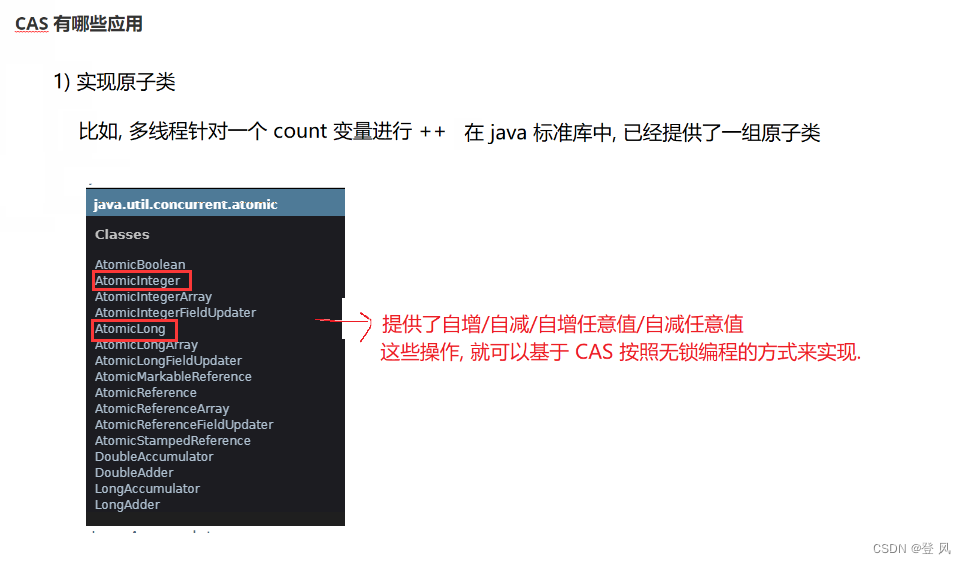
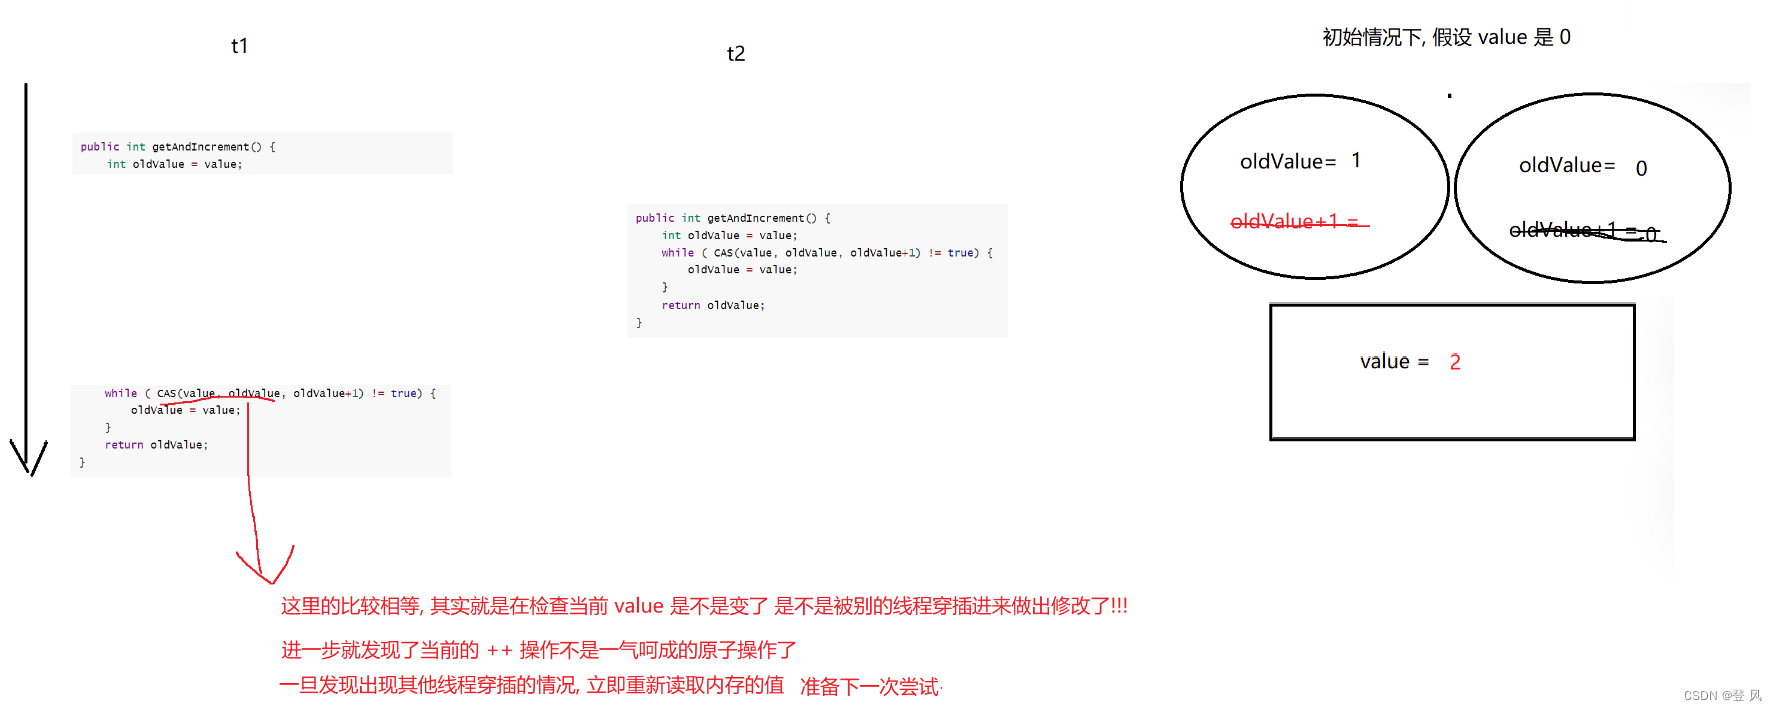
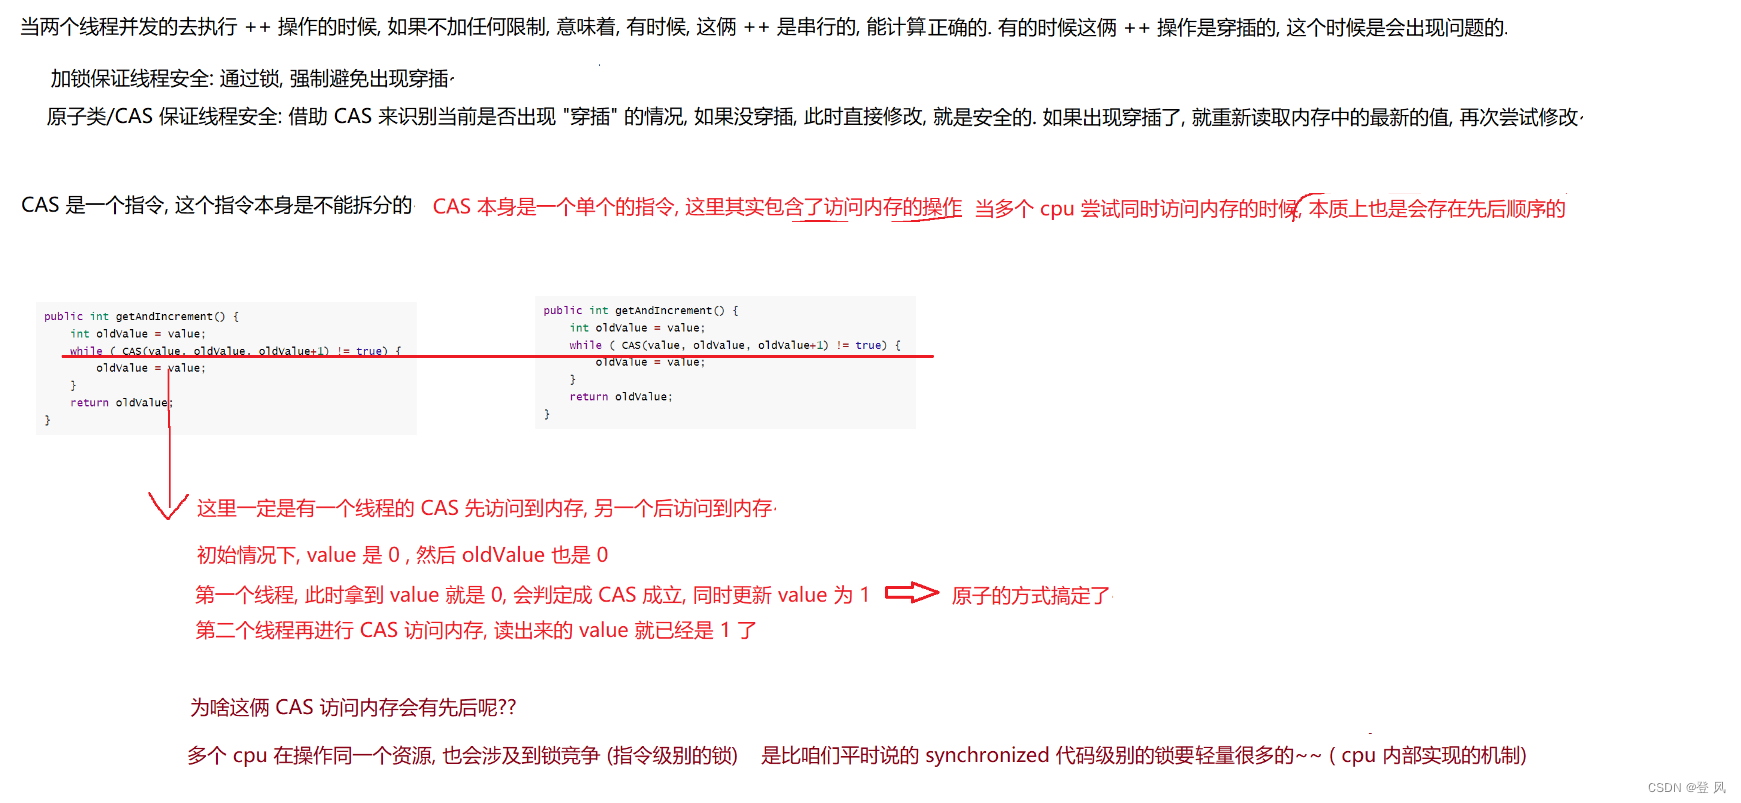
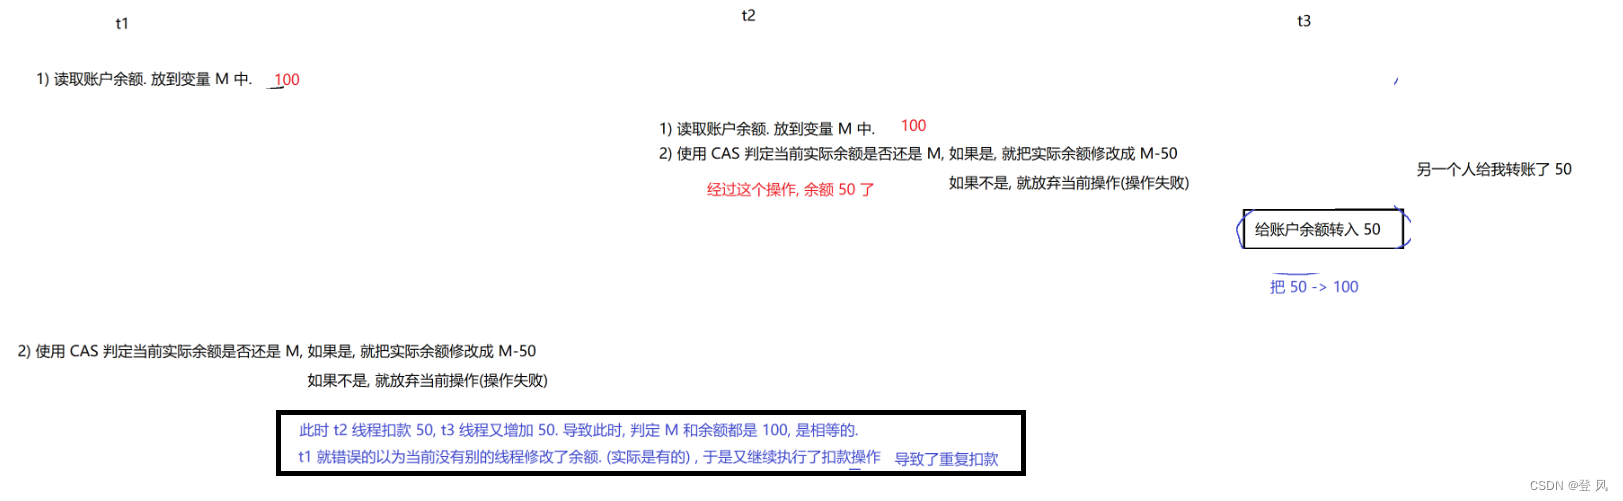
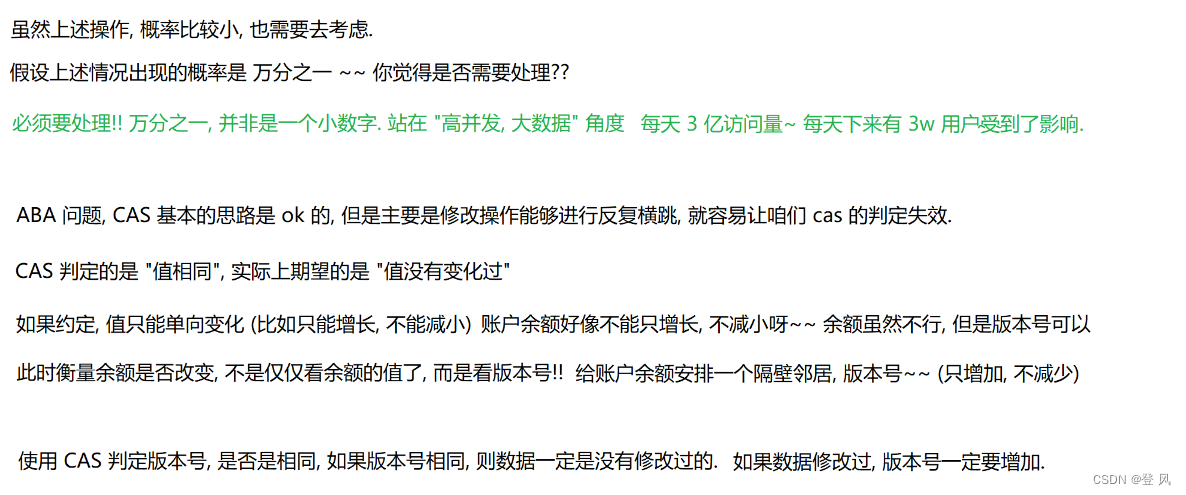
利用原子类实现线程安全

上述的代码如下:
import java.util.concurrent.atomic.AtomicInteger;//利用原子类实现线程安全
public class Demo25 {private static AtomicInteger count=new AtomicInteger(0);public static void main(String[] args) throws InterruptedException {Thread t1=new Thread(() -> {for (int i = 0; i <5000; i++) {count.getAndIncrement();//后置++}});Thread t2=new Thread(() -> {for (int i = 0; i <5000; i++) {count.getAndIncrement();//后置++}});t1.start();t2.start();t1.join();t2.join();System.out.println(count.get());}
}
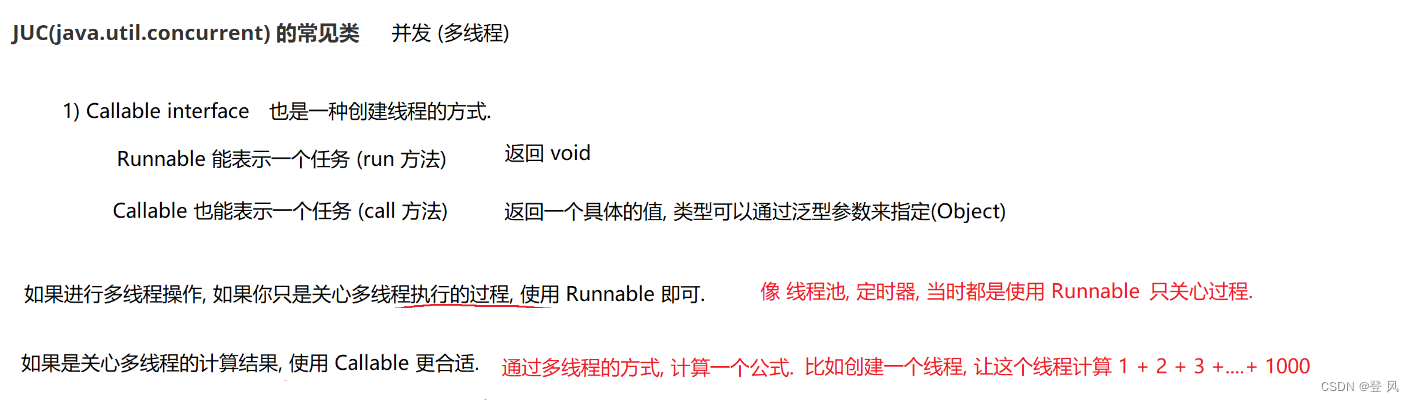
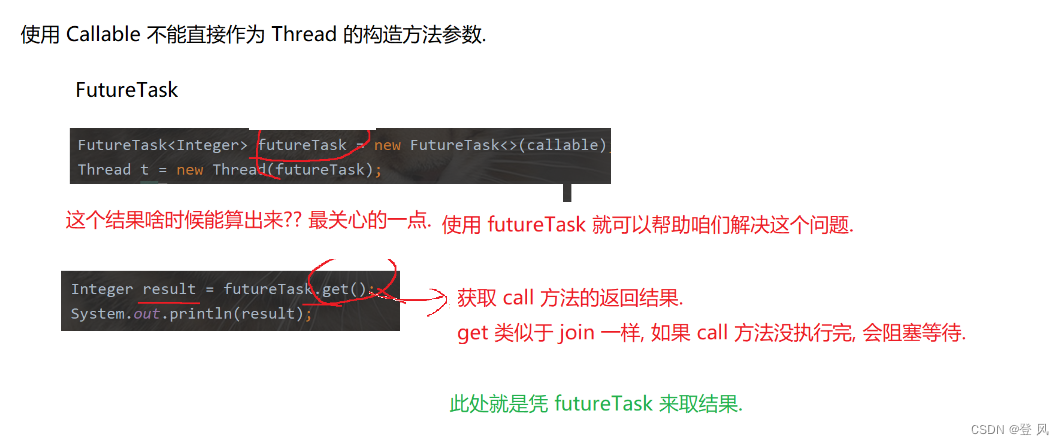
下面利用Callable建立一个线程
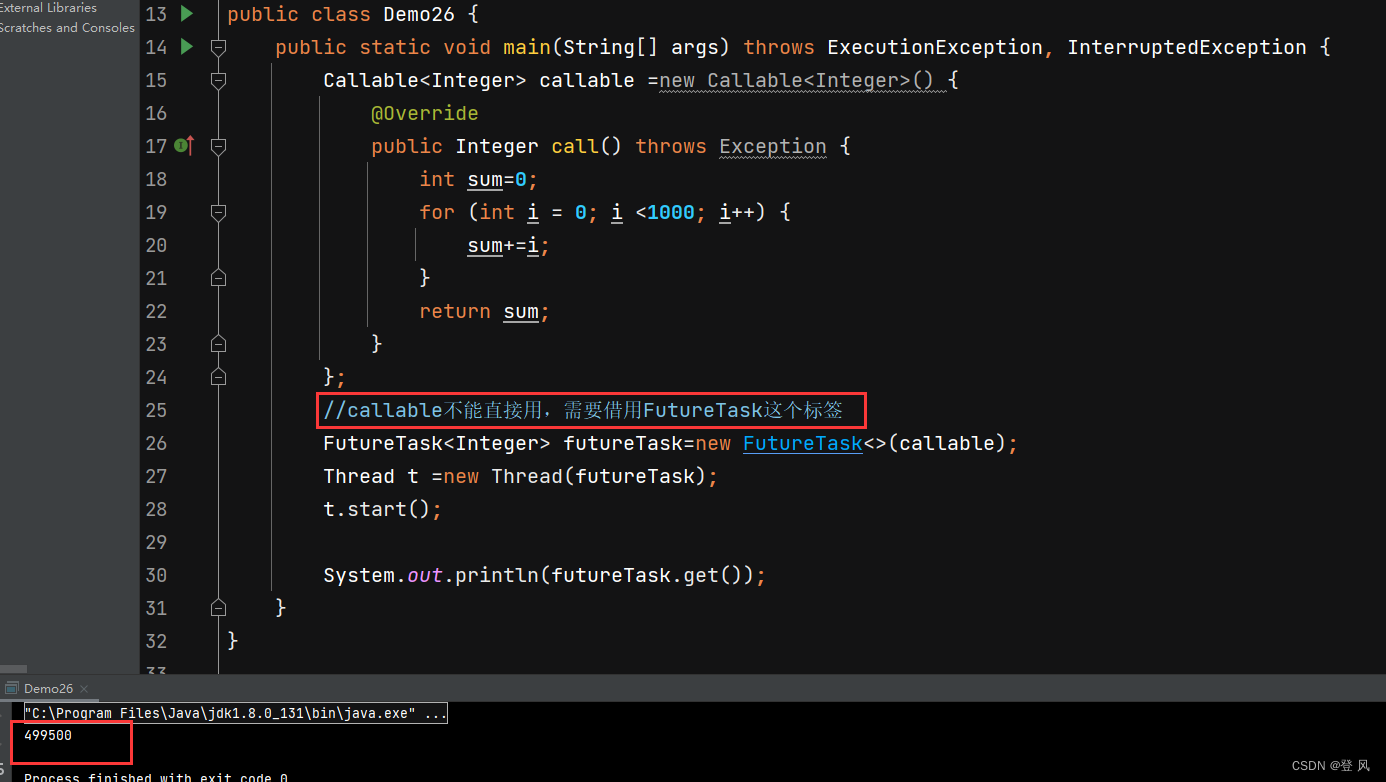
上述过程的代码如下:
import java.util.concurrent.Callable;
import java.util.concurrent.ExecutionException;
import java.util.concurrent.FutureTask;
//利用Callable建立一个线程
public class Demo26 {public static void main(String[] args) throws ExecutionException, InterruptedException {Callable<Integer> callable =new Callable<Integer>() {@Overridepublic Integer call() throws Exception {int sum=0;for (int i = 0; i <1000; i++) {sum+=i;}return sum;}};//callable不能直接用,需要借用FutureTask这个标签FutureTask<Integer> futureTask=new FutureTask<>(callable);Thread t =new Thread(futureTask);t.start();System.out.println(futureTask.get());}
}

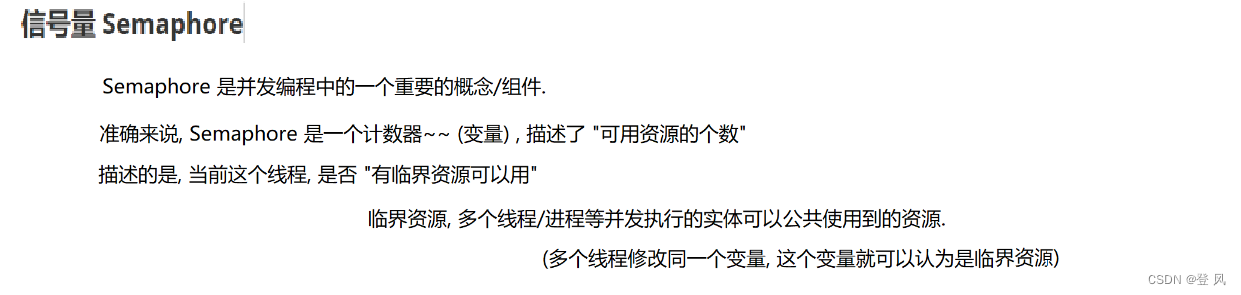
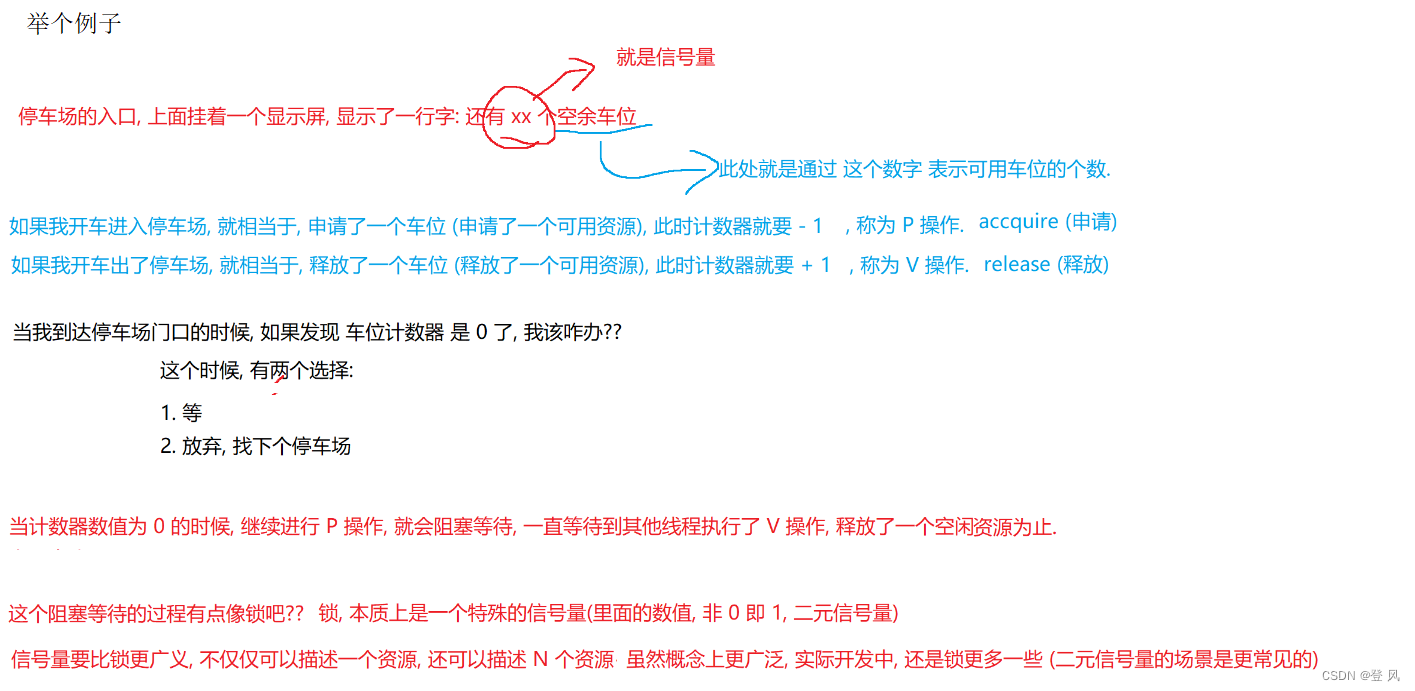
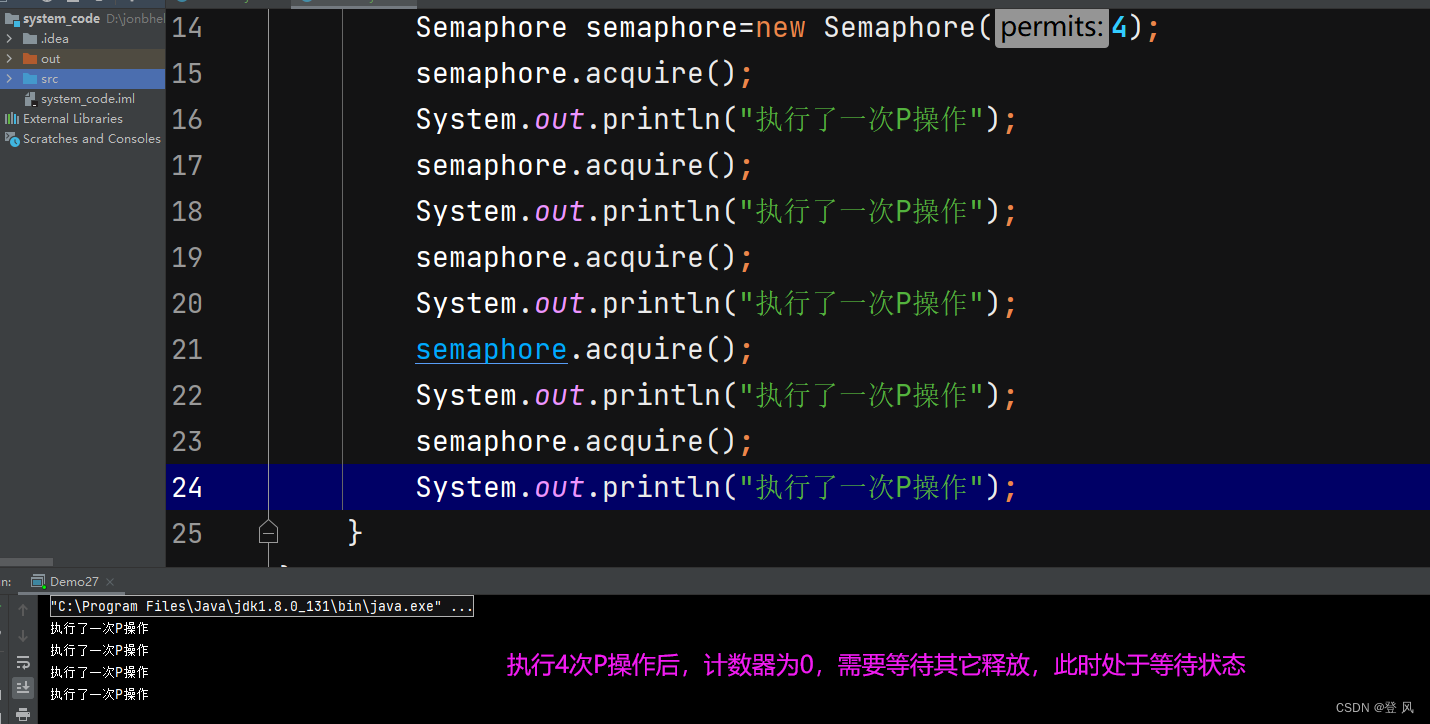
下面简单使用一下这个信号量
上述过程的完整代码如下:
import java.util.concurrent.Semaphore;
//Semaphore 信号量
public class Demo27 {public static void main(String[] args) throws InterruptedException {//指定计数器的初始值Semaphore semaphore=new Semaphore(4);semaphore.acquire();System.out.println("执行了一次P操作");semaphore.acquire();System.out.println("执行了一次P操作");semaphore.acquire();System.out.println("执行了一次P操作");semaphore.acquire();System.out.println("执行了一次P操作");semaphore.acquire();System.out.println("执行了一次P操作");}
}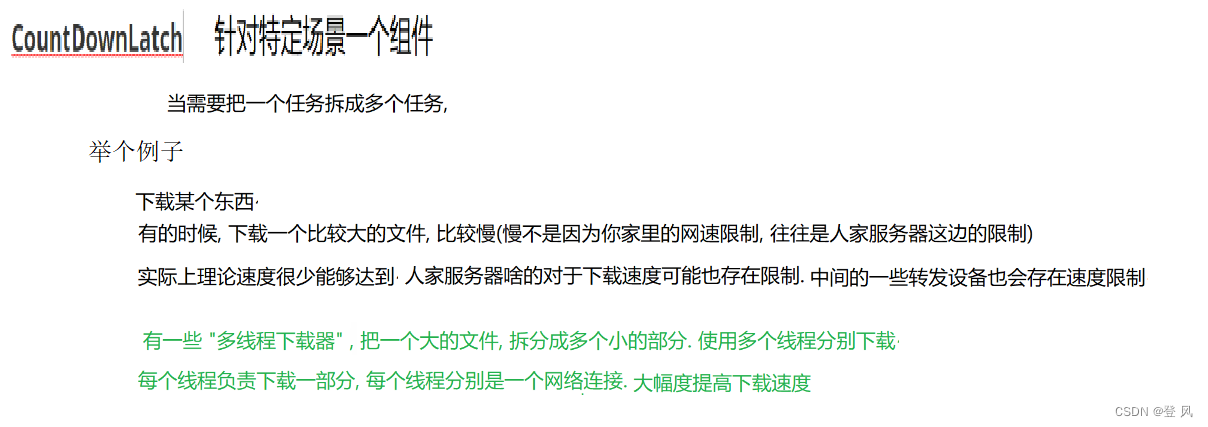 同时等待 N 个任务执行结束.

上述过程的完整代码如下:
import java.util.concurrent.CountDownLatch;
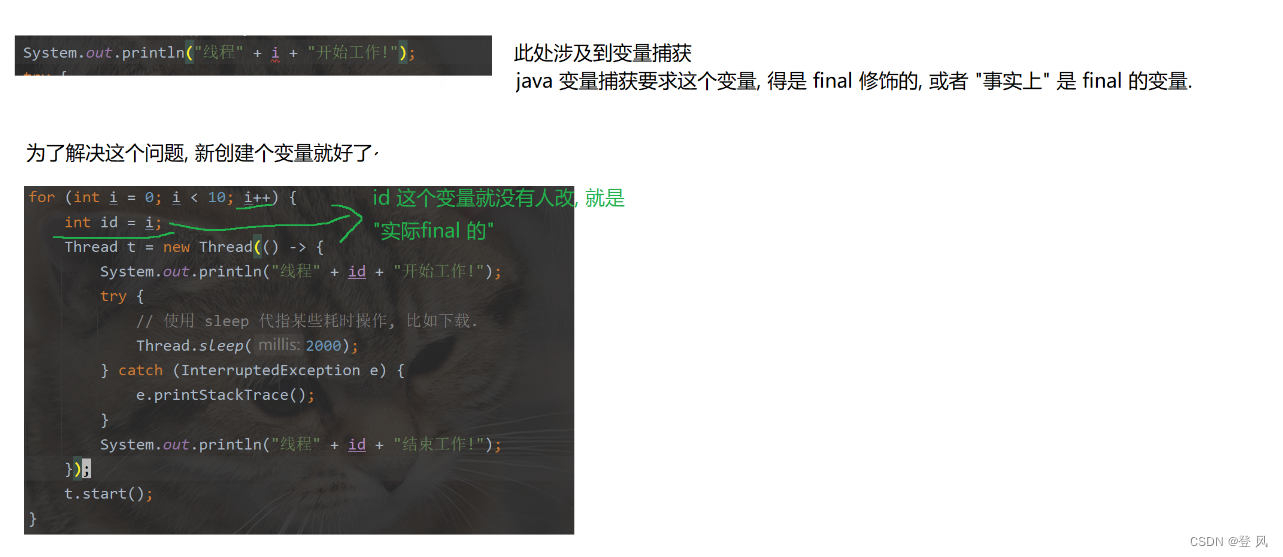
//使用CountDownLatch将任务分配给多个线程来完成
public class Demo28 {public static void main(String[] args) throws InterruptedException {//指定创建任务的数量CountDownLatch countDownLatch=new CountDownLatch(10);for (int i = 0; i <10; i++) {int id=i;Thread t=new Thread(() ->{System.out.println( id + "开始工作");try {Thread.sleep(2000);} catch (InterruptedException e) {e.printStackTrace();}System.out.println( id + "结束工作");// 每个任务执行结束这里, 调用一下方法,记录该线程是否结束// 把 10 个线程想象成短跑比赛的 10 个运动员. countDown 就是运动员撞线了.countDownLatch.countDown();});t.start();}// 主线程中可以使用 countDownLatch 负责等待任务结束.// a => all 等待所有任务结束. 当调用 countDown 次数 < 初始设置的次数, await 就会阻塞.countDownLatch.await();System.out.println("所有任务执行完毕");}
}